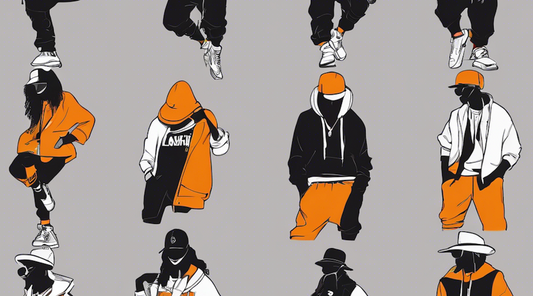
![3D CG Production: [ZEPETO: January Release Items] Latex spherical green bag&Fluorescence Green Dress](http://open-fashion.com/cdn/shop/articles/january_Latexsphericalgrennbag_FluorescenceGreenDress_240131_thumb_6822d4fb-47e2-48c8-8839-8d3db11fe01f.jpg?v=1706667413&width=1100)
Introduction
Hello ☺
I'd like to briefly introduce the production content of the items we recently released.
You can find the items here ↓ This time, we're introducing both bags and wear at once!
Bag (Green): Latex spherical green bag
Bag (Silver): Sparkling Spherical Silver bag
Dress (Green): Fluorescence Green Dress
Dress (Silver): Sparkling Silver Dress
Theme and Design of Items
Theme
The works introduced this time were selected for the accelerando.Ai CONTEST #5 -Coordinated Bag-.
The contest theme was "Bags that match existing design wear."

Wear: Bright Color
The glossy material and distinctive neon colors are the theme.
The overall form is simple yet conveys a sense of glamour.
Bag: Handbag Designs
The transparent material and rounded shape are very unique and cute.
It gives a futuristic impression, but also has practical aspects, like a large pocket with a zipper on the outside and an adjustable strap buckle.
Design
Silhouette
<Bag>
The round silhouette isn't a perfect sphere but has a slightly faceted shape.
We finalized the shape while combining the simulation in CLO, especially considering how natural the pockets look when attached.

We initially extended the shoulder strap as is, but it was difficult to pass over the shoulder, and the base would distort when moved. So, we opted for a gathered approach.

<Wear>
Deciding which sleeve silhouette to reproduce was a challenge, as both the left and right had interesting designs.
The right sleeve had a distinct design, changing the overall impression when made symmetrical.
On the left, puffing up the sleeves and holding them with a band seemed to provide a nice balance of volume, so we decided to go with that.

ディティールDetail
<Bag>
Inside the bag, we placed frills made of gathered tulle-like fabric.
As mentioned in the middle of this blog, we set the animation last to ensure the fabric moves naturally.

<Wear>
In the generated image, a wide belt fits at the waist, but we decided to let it hang loosely for a bit of movement in ZEPETO.

Material
<Bag>
The body and inner frills’ transparency, the metal feel of the buckle, and the texture of the pocket and straps were crucial. Multiple elements were combined in one item, so using maps and shaders effectively was essential.
We also adjusted the normal map for the transparent body to avoid a monotonous texture.

<Wear>
Material was a critical element of this design, so we focused on maintaining the texture throughout the process without altering the impression.
More details on shaders are discussed in the latter part of this blog.

Here is the ZEPETO model we created this time.


Key Points of Production
Bag: Animation
We first tried a Cloth simulation to make the frills inside the bag flutter slightly.
Cloth Simulation is typically used for realistic cloth expressions in games and apps.
When setting up Cloth Simulation, it's necessary to paint the simulation range on the mesh.
Since the frills were placed inside the mesh, it was challenging to paint only the frills, so we had to abandon this method. There might be a way to partially hide parts, but we haven’t tested it yet.
Next, we tried animation using shape keys.
The first attempt used a Displace modifier on all the tips, creating two variations.

However, this method made everything move simultaneously, which wasn't quite like fabric.

The second method involved alternating vertex selection, but this also resulted in mechanical movement.

The third method used Proportional Editing for intentional movement, which added complexity to the motion.

Finally, we made some adjustments in Unity, and the end result resembled seaweed undulating underwater.


Wear: Shader
Let's touch upon the shaders used for the wear this time.
A shader is a program or instruction that determines the appearance and texture of a 3D model's surface. There are many shaders in Unity.
Choosing the right shader to replicate the desired texture is a crucial point.
Upon testing various shaders again, we found that the Built-in shader was highly suitable.
Here, we compare the Standard shader and a few Built-in shaders from different perspectives.
(Note: We used Built-in_Lit for this project.)
Light Reaction
| The intensity and contrast of light | |
| Standard | Strong |
| Builtln_Lit | More subdued than Standard |
Upon comparison, the intensity of light in Standard is quite prominent. This difference is especially noticeable in black and white images, where the brightness contrasts are clearly visible.

Color
| How colors appear in Unity | |
| Standard | Blue tones are more pronounced. |
| Builtln_Lit | Closer to the map colors. |
When loading the Color (Albedo) map, I observed the difference in color representation.
The Standard shader emphasizes the blue tint, while the Built-in_Lit shader shows less deviation.
(Note: To focus on the color difference, the brightness of the map on the left is made brighter than what is imported into Unity on the right.)
↓Standard

↓Builtln

Cull
| CullOff | |
| Standard | Needs to be added manually. |
| Builtln_Lit | Built-in function. |
Choosing a shader involves considering more than just texture. Among these considerations, the availability or the possibility of adding a Cull Off function is crucial.
CullOff means turning off the polygon culling process, which is the process of omitting polygons from rendering under certain conditions.
Normally, in 3D rendering, polygons not visible to the camera (especially those on the backside) are omitted to improve performance.

Not all shaders support this function, so if CullOff cannot be applied, it becomes necessary to pre-create polygons for areas that will be on the model's backside.
Although there are polygon count limitations for each model, typically, production is carried out assuming that the shader will display the backside.
With Built-in shaders, you can choose from Off, Back, or Front options for the Cull setting, allowing for flexible application.
Other Considerations
For this project, we used Built-in_Lit, but there are other types of Built-in shaders available, accommodating a variety of textures.
For the silver-colored items, both bag and wear, we used Built-in_Sparkle to create a glittering effect.

(Note: For more detailed information, please refer to the official ZEPETO website!)
Also, I learned later that you can insert maps into each RGB channel, which helps reduce material capacity.
Lastly

I hope you enjoyed this introduction to our newly released wear.
Personally, finding a shader that was easy to work with was a great achievement, and I look forward to applying this knowledge to future creations!
Our company regularly hosts the accelerando.AI Design Contest, selecting winners to create ZEPETO models.
Contest details (written in Japanese): https://jp.open-fashion.com/blogs/news/accelerando-bags-matching-brand-design
The contest is held about once a month, so if you're interested, please participate.
(For more details, please visit the OpenFashion official website.)
We look forward to creating a diverse range of items with all of your ideas.
Please look forward to our next release!☺
![[Easy on Your Smartphone] How to Create ZEPETO Items with Maison AI](http://open-fashion.com/cdn/shop/articles/387ac76082623e94218de7c076a87675.jpg?v=1712232721&width=533)